Caravan Self Containment explained

Self-containment for European Caravans explained.
We have so many people asking how to do the self-contained plumbing work on a caravan; our staff is all trained to do this work. Like most jobs, it is fairly easy once you know what to do.
If you have no idea about plumbing, are too busy, or are not very handy, then get some help or book it with us, and we will sort it out for you.
There are five questions you should ask yourself before deciding to do it yourself; I have listed them below.
- What components will I need?
- How can I ensure the water drains properly at all times?
- Who will inspect my workmanship and sign it off for me?
- Which traps will I need for which applications?
- What are the regulations, and where do I find them?
In this blog, we will explain what to do by answering each question in turn
What components will I need?
The number one rule for efficiency is to buy a kit that contains everything you might need to complete the job; in the end, you might have one or two bits left over, but that is a lot more efficient than driving around town trying to match different components from various suppliers to make up something that is not going to leak and will eventually pass.
Where do I find the traps?
Where do I find the fittings?
Where do I find the tanks?
We have been doing this since the regulations were first introduced, about a decade ago. If I had a dollar for every customer who started thinking it was going to be easy and then wished they hadn't, I would be doing very well. Sometimes, they visit our warehouse 5 or 6 times because they need extra components they forgot, or they tell us they were unaware they needed to do something to complete the job. After going to and fro between us and the certifier, trying to get it signed off, they will often have spent a couple of days; I have written this blog to make the process easier and simpler for you, us, and the certifier.
We supply kits that contain all you need; see the links in the paragraph below:
Let's start with the caravan plumbing first. Generally, none of the waste plumbing installed in European caravans complies with NZ regulations. European Caravans mostly have two wastewater outlets with flaps that protrude from one side, just under the skirt; the plumbing consists of 28mm grey or black pipe with simple, reusable push-fit couplings. The main reason the caravans fail is that the sinks and shower tray have no waste traps, and the waste outlets should have a single shut-off valve that connects to a portable waste tank outside.
The first thing to do is buy a kit containing all the components needed to alter your caravan's plumbing. You will be able to reuse some of the existing fittings on your caravan. The kits we supply are collections of parts that should supplement your existing plumbing to meet NZ regulations. See the image below and the link to buy the Caravan self-containment kit

Contact us if you need something different
We will go into more detail about how the work is done later under the third heading. (How can I ensure that the water will always drain appropriately?)
Once you have the parts to convert your Caravan plumbing, you will need a tank that connects straight to the caravan that you are converting.
Purchase the caravan self-containment tank

If you already have a tank that looks similar to the one above, you have two options.
- You can convert your existing tank using the following kit: Purchase the tank conversion kit.
- Or you can adapt your existing tank to connect to our tank and double your wastewater capacity. This increases your caravan's self-containment capacity, making it suitable for more occupants.
How can I ensure the water drains properly at all times?
The wastewater outlet on the caravan must come out the side of the caravan and should have enough head to flow into the portable wastewater tank; that is why the wastewater tanks are made low and flat. Our kits include a 25mm ball valve with Camlock fittings, which you mount as close to the wheels as possible. This is important because if the valve is mounted on the extremities of the caravan, the water needs to travel further. It is more likely that the valve will be damaged when the caravan swings past obstacles while in transit. Also, you do not want wastewater coming out on the awning side or entrance door side of the caravan, or you will trip over the tank all the time.
Once you have located the point of discharge, you can start to alter your plumbing under the caravan. Start with the shower tray and fit the standard trap without the waste inlet. Run the shower pipe as tight as possible to the underside of the floor toward the ball valve. Then run your vanity and kitchen sink plumbing separately towards the same ball valve; these two pipelines must be mounted on blocks at about 50-60mm below the shower outlet pipe to prevent backflow and prevent water from the higher-level sink and vanity from ending up in the lower-level shower tray.
The 28mm Y connections in the kit are very useful here, directing the water flow away from the shower tray and out to the discharge point and valve. Keep the Y junction distances as far from the shower tray as possible.
Who will inspect my workmanship and sign it off for me?
All self-containment requires a sign-off. Below are a number of organizations that can put you in contact with a self-containment officer, who will process your paperwork and deal with the admin.
- The NZMCA is the original organisation behind the implementation of self-containment and its policies. Their members mostly own large motorhomes and caravans, but they do not particularly cater to smaller vehicles without a separate toilet and shower compartment. Becoming a member of the NZMCA will give you access to their resources, and they arrange member discounts for ferries, campsites and insurance
- All Points Camping caters to people with smaller vehicles who do not have dedicated shower and toilet facilities. They work hard to find sensible ways to meet self-containment regulations without considering high-end, big-value vehicles.
- Vantage RV has self-containment certifiers; we can inspect vehicles and process the paperwork through the NZMCA or All Points Camping. We charge an inspection fee, and if any additional work is needed to obtain the certificate, we will charge an hourly rate to complete it and get it signed off.
What are the self-containment regulations, and where do I find them?
The regulations are well documented, and in this paragraph, you will find links to solutions and other sites that outline the rules in detail. Here is a summary of the most critical aspects of the regulations.
- Traps must be within 1 meter of the waste source
- If the waste pipeline is more than 3 meters long, it must have a breather
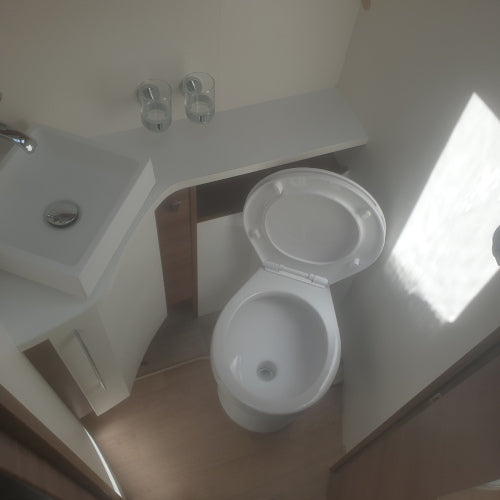
- Usually, there are no problems with the cassette toilets in modern European caravans, so don't stress about the toilet
- The freshwater tanks should have enough capacity to provide 4 L per person for three days; for example, 24 litres is required for two people for three days. The minimum size of the freshwater tank should be 20 litres. We have 40-litre portable freshwater tanks available
- The wastewater tank should be the same size or slightly larger than the freshwater tank; if the wastewater tank is smaller than or equal to the freshwater tank, you will need a tank level indicator on the wastewater tank to show when it is getting full. See waste tanks
- What are the regulations? See the link
This blog provides free guidance. It is not designed to provide definitive instructions for specific vehicles or to interpret the rules and regulations. If you are unsure, you should seek professional help. Contact us